Showing posts with label Napkins. Show all posts

Friday, August 28, 2015

Creative Inspiration - Week 33 2015

Back this week to share a layout that I have created whilst I still had my mojo flowing from all my scrapping for the show. 

I was lucky enough to still have some of the Crate Paper - Open Book Paper range sent to me to play with by Leanne at Mad About Scrappin. 

So here's this weeks layout.
Now I created the base of this layout using a piece of heavy weight paste board as I wanted to play around with a few napkins from my stash. I have then added a mix of paper doilies including some of the cute coloured ones that Leanne has at the Mad About Scrappin shop. Then finished off the base by added some washi tape in a light grey stripe to help frame the layout. I then added a title using a matching word sticker from my stash adhered with 3D foam.


I then had a bit of fun with another digital journal card I created using a variety of digital stamps and printed onto a graph journal card. ** see butterfly image hidden in the background.
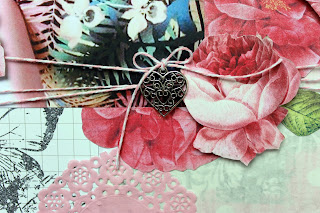
I then used the floral rose paper from the  Crate Paper - Open Book Paper range and cut out some of the leaves and roses. I layered them all around before I adhered any of them and some were adhered using 3D foam tape to add some dimension. 

 I added some pink and white bakers twine to create a bit of interest on the layout. 
Then finished the whole layout off by adding a bow of bakers twine to a cute filigree metal heart. 

It has been a while since I have done much fussy cutting and think that my fingers are itching to get some more fussy cutting done.

Well.. hope that everyone has a super weekend.

Take care and Happy Scrappin.

TFL, M x

Saturday, May 2, 2015

Exciting Stuff !!!!!


Hello all.

I am most excited to be able to share with you my first post EVER on the Crafty Crusaders blog. 
I am looking forward to being able to share with you all what I have able to create using some of the goodies sent to my to play with. 

Now just to explain a little... one of my daughters is turning eight this month. 
For her birthday party she has decided that we are having an Alice In Wonderland Tea Party type of party with a bit of our own twist. 
Now... the twist is that for us there is A LOT of Alice in Wonderland things on the Internet to be able to create for a party. 
However we wanted it a bit more girlie in the twist so we have decided to create our own little bits and pieces for the table centre piece. 
With that in mind we started to chase up teapots to use for the centre piece of the table. As much as we wanted to use mismatch teapots, I wanted them to be personalised a little. 

I have already started the table centre pieces off with creating these goodies..

I managed to find one more teapot that I loved the style of that I just had to alter to finish off the table centre piece.

So with that is mind I would like to show you how I took this  patterned china teapot and made it our own. 

I started off the process by adhering two different napkins (just the single ply of the napkin that is patterned) directly onto the teapot using a glue wash and a #4 Shader Princeton Camel Hair Brush. I then adhered a paper doily that I had cut into quarters where I desired. Then I added a few more pieces of napkin to blend in the doily to the base. For the inner rim of the tea pot, top of the lid and the inner spout I used some Pebeo Studio Acrylic Paint #26 Mars Black to highlight them. I did use two coats to give a nice matt finish. This went onto the shiny surface of the teapot really well too.  

Now.. I found the napkins a little bit bright so using a #4 Shader Princeton Camel Hair Brush I painted the whole teapot with a white wash of  Pebeo Studio Acrylic #41 Vivid White. 
I then let the whole teapot dry before sealing it twice.

Then came the fun bit.  I gathered up paper flowers that I wanted to play around with on this teapot. I had some plain pink paper flowers that just didn't quite match the teapot colours. With that in mind I altered the flowers using a foam brush and some Pebeo Studio Acrylic #41 Vivid White Paint then a smidge of Pebeo Studio Acrylic #50 Magenta just on the edges . It really reminded me of the Queen from Alice in Wonderland when I was painting these.... painting the roses red and all that. 

You can see the large queen of hearts playing card I have altered with white napkin here that I have used as the base of the embellishment cluster. I applied a white wash with Pebeo Studio Acrylic #41 Vivid White over the whole playing card before embellishing over it.

Here you can see I have used some Pebeo Studio Acrylic Paint #26 Mars Black and a dry foam brush to highlight the rim of the teapot and the spout just a little. I have also added subtle highlights to the textured napkin over the whole tea pot too.

I can also tell you too that I have played around with a few of the other paper roses on this teapot too with some of my Mepxy Markers. Once the aqua roses and pink magnolias were adhered to the tea pot I wasn't really happy with the colour match. The aqua looked too green to match the blue of the napkins and the pink magnolia were originally very very pale pink.

I did  the same thing with my Mepxy Brush Markers to finish off this large rose. It was also very pale pink. Just a touch here and there of the markers to the edges and I finally got the effect I was looking for. 
Have had so much fun playing around with creating this teapot and thinking outside the box just a little. Cannot wait to be able to set the table up for the party now. Have one very excited little girl who LOVES her new teapots for her party.

Lastly I wanted to show you the quick card I created using a digital stamp from my stash I have printed onto some Canson Illustration  250 Paper and coloured in using the Mepxy Brush Markers. 

Layered a couple of digital stamps onto a Project Life Graph card for the base age card. then adhered this on some of the matching Teresa Collins paper range I used on the teapots. Added some paper flowers, a chipboard greeting and matching sheer blue ribbon. 

To finish the card off I have printed the little girl digital stamp from my stash onto some Canson Illustration Paper and coloured it very basically with the Mexpy Brush Markers to keep it simple. 
She was then adhered using 3D foam to give a little dimension.
Super quick but fitting with the Alice In Wonderland look.

Well off to play with my Mepxy Brush Markers and some more digital stamps I have printed off.

Till next time. 

Get Creative !!

Michelle W xxx


Tuesday, June 11, 2013

Challenging fun with Scrap Around The World

Hello all..
 
Been finally able to scrap for me... what you say... not design team work...
 
YES... have been wanting to play along with a few challenges these past few months and this month I decided now that I have wound down my design team commitments it was time to play.
 
So.. where did I start...
 
Well I just couldn't pass a chance to play along with this month's challenge at Scrap Around The World.
 
When I saw the Scrap Around The World mood board

 and sketch
I just knew it was crying out to be played with.

Must say I it was so much fun to play along because I was able to make so much mess. I had found the photo used in this layout on my daughters camera from our recent trip to Townsville.  It really matched in with the ideas I had flowing from the mood board. I also played around with the sketch a little to suit my portrait photo.
 
So here's my take on the latest Scrap Around The World challenge.

Mind you it is a little hard to see but I did get messy creating the base of my layout using my favourite napkin technique, texture paste, ink, stamps and some twinkling H2Os.
 
 I also created my top layer of my banner using some really yummy washi tape I found stashed away while cleaning my scrap room.
 
Thanks for the inspiration Scrap Around The World.
 
Check out everyone else's take the challenge.. I am sure you will be inspired as I was.
 
TFL, M x


Saturday, April 20, 2013

Making a Major Helmar Mess

Okay.. so I have had a chance to play around with this month's Helmar Challenge.
 
Mind you it really got me thinking that's for sure. I am not normally one to document daily or even weekly things. So I really had to have a good think about this challenge.

 
 So when I sat down and though about this challenge I started to notice that no matter what day of the week it is and no matter what I am doing I always have my trusty faithful coffee. To top it off my coffee is always in the same thermos cup at hands reach no matter what.
 
So for me the inspiration I used for my layout is my coffee. Bit of a challenge to scrap about as I don't normally choose something like this as my subject.
 
Here's what I created with this in mind.
 
I thought I would quickly share with you all how I created the base of my layout. Mainly because it was so much fun, I got to make a HUGE mess, I used up a pile of old chipboard stash letters and I got to play with some of my favourite Helmar products.
 
 For the base of my layout because I knew I was going to play around with a glue wash (made from 1 part Helmar Acid Free Glue and 3 parts water) I didn't want the base to warp. I don't know about you but I have LOTS of chipboard letters left over that I never seem to use because I don't seem to have all the letters I need in the same font when doing a title. So I worked out what I needed with the chipboard letters, spaced them out on the base and then adhered then once happy with placement using Helmar Acid Free Glue.
 
Then.. this was where the fun REALLY began and I mad so much mess..
Once the letters were dry I gave the whole thing a light coat of paint and hit it with the heat gun to speed up the drying process.
 
Once dry I then took single layers of patterned paper napkin I had cut into small squares and adhered it to the base using my Helmar glue wash. Once dry the red paint showed through and highlighted the negative of the napkin. I then coated the whole base with a light coat of red paint wash. to tone it down a little.
 
Next I wanted to  highlight the chipboard alphas to make them pop out of the layout. I grabbed a permanent marker and carefully coloured in each letter then gave the base a light coat of Helmar Krystal Kote Fixative.
 
The final touch I then added to my base was to lightly go over the letters with a white paint wash to highlight them and blend them into the background a little. I went over it a few times using a heat gun to dry it several times till I was happy. Then finally have the base a coat of Helmar Krystal Kote Matte Spray to finish the base off and take out any shine.
 
Had so much fun playing around with this challenge. Not only with the theme.. but because I had a chance to play around and experiment with some Helmar products to create my own dimensional base for my layout.
 
Why not have a play around with this challenge yourself.
 
TFL, M x


Thursday, February 14, 2013

Making a mess but having fun

Hello Everyone.
 
Michelle here from Adelaide, South Australia.
 
I am super excited to have been invited back to play along with you all at Mad about Scrappin.
 
I have been having a bit of fun this month so far mixing it up with this months challenge.

I think when I see the word challenge my eyes light up and my brain seems to tick over.
so for this month's challenge I got to work creating a layout of my eldest daughter.
 
Now.. I have just recently moved house and am slowly getting rid of piles of packaging and cardboard from new furniture I have bought. Bearing that in mind I have some of the packaging to be of use for future scrap booking projects... that is much to my children's disgust. "More cardboard packaging to find a storage place for!" they said. lol
 
So for my technique as part of this month challenge I have recycled some of the cardboard packaging as my base for my layout. To the base I wanted to add some texture and have managed to do this using a few layers of paper napkins adhered directly to the cardboard base with a glue wash. The key is to use a paint brush to apply the glue wash, be gentle and not worry about wrinkles as they really do add to the effect!  Plus the best bit is that because the recycled card was quite thick it was able to work well with the glue wash and napkins without warping when it dried.
 
After the base had dried I then applied a wash of watered down paint and then got busy with multiple colours of glimmer mist to suit the paper I had chosen to use. The glimmer mist helped to highlight the scrunched napkins. Plus the glimmer mists also gives the base of the layout a slight shimmer when the light hits it.

 
The last technique I have used is hand cutting. I actually find hand cutting quite relaxing..
Nuts I know!
Because I was in the recycling mood AND because I just couldn't find the right flourish that I light I decided to mix up a few of my wooden flourishes and trace off the bits I liked onto recycled card till I had a flourish I was happy with. I then used my craft knife to remove the excess card stock and then coloured it with glimmer mist till I was happy with the colour.
 Super easy and at least I got the exact flourish I wanted.
 
 
Super happy with the end result. I got to recycled some of my packaging AND got to get messy creating in the process.
 
 
Why not play around with the challenge this month and see what you can create.
 
TFL, M x


Thursday, November 22, 2012

Cherish those around you

Hello all.
 
I am most excited to be able to share this Helmar project I created just recently with you all.
 
First to explain just a little about the project...
 
I absolutely adore creating things for other people. I also love being able to create something with a bit of meaning behind it. So bearing all that in mind I recently had a trip up to Townsville. Now before the trip I had it set in my mind that I wanted to be able to create a little something for the Woman's Hospital where my first child was born and became a little angel in heaven at the same time. The staff at the hospital were amazing and have been a great support to me and my family ever since. This year marked a special anniversary with it being his sixteenth birthday. So I wanted to be able to give back to all those special people that work in the Neonatal ward. I find the work, love and support that they put into their job truly amazing and have been blessed to have had them help myself and my family throughout the past years.
 
So.. with all this in mind I wanted to create something that could be hung up to remind everyone how precious time is and to not take anything for granted. Life is just too precious in my mind.
 
I created a canvas for the ward that was about 30" x 40" in size. I had lots of fun making so much mess with some Helmar Decoupage Paste, napkins and texture paste to create this canvas base.
 
 
I coloured my texture paste using an iridescent red paint. However because I also wanted to add some depth to the canvas with some script stamping, once the paint was dry I sprayed the whole canvas with a light layer of Helmar Cystral Kote Fixative. This prevented any running. Once I had finished all the stamping I then gave the whole canvas a coat of Helmar Crystal Kote Matte Vanish. This took any shine out of the base from all the adhesives and also seal the whole base nicely.
 
Using Helmar Liquid Scrapdots to adhere the embellishments to the canvas meant the I could create a lot of depth and dimension to the base with so much ease. And the best bit was that I knew with all the help from my trusted Helmar products that the canvas would stand the test of time without anything falling off.

 
I had stamped butterflies onto transparency paper that I had adhered napkins to. To adhere them to the base I used a dab of Helmar 450. It adhered them nicely to the texture paste with little effort.


Off to get crafting with some more Helmar goodness.
 
TFL, M x

Thursday, July 12, 2012

Love is... Faber Castell and Helmar together


Hello all, Michelle here from Adelaide, South Australia.

The weather here has been perfect for crafting.

So with a little help from some Helmar and Faber Castell I had a fun time playing with lots of texture and colour.

Who would have thought that Faber Castell Gelatos could be so much fun.
Not having had a chance to play with them before I really wanted to test them out.
And I must say.. I was not disappointed with what I was able to achieve.

By creating the main part of my title using a hand cut template and some texture paste I was able to create a nice base. I then used some Faber Castell Gelatos to colour and blend directly onto the texture paste once it was nice and dry. I love the effect that I was able to get and Faber Castell Gelatos were a perfect match for the texture paste. They adhered and blended nicely.

I was also able to finish off the centre of my title by hand colouring the title using a Faber Castell Aquagrip Aquarelle and blended it using water. It really made the title have pop and texture with very little effort.

Now.. I absolutely love to hand cut and water colour as some of you may know. I find it quite relaxing. With a little help from some Faber Castell Aquagrip Aquarelles I was able to colour away to my hearts continue with ease. They really do create a nice smooth finish to the water colour look.
Then with a little help from Helmar I gave the flowers and leaves some dimension by using some Helmar Liquid Scrap Dots to adhere them down at various heights.


And if you look real close... I have adhered contrasting seed bead to the centre of the flowers using some Helmar Gemstone Glue.

And if you take a closer look at the background of the layout I have used my napkin technique and my Helmar Acid Free Glue to create the base of my layout. I also gave the edges of the layout a bit of a shimmer by blending the edges with my Faber Castell Gelatos and water... gave a nice shimmery look to the edges.

And here's the full layout.

Lots of colour and dimension. But the best bit was...
I made lots of mess and had a blast trying out some fun techniques with Helmar and Faber Castell.

Why not give some a try and have fun playing around.

TFL, M x

Thursday, June 21, 2012

Butterfly Dreaming


Hello all.

Michelle here from Adelaide, South Australia again.

Okay... so here is the technique that I have been playing around with lately that everyone has been chasing... hehehehehehe..

Beware though.. this is a little bit of a post on the long side..
So grab a cuppa and pull up a chair..

I promise you won't be disappointed to see how easy it is to go

from this

to this

with just a few easy tips and trick and LOTS of Helmar goodness!

BUT....

You'll have to head over to the Helmar Design Team Blog to check it out!

Head on over now!

TFL, M x


All about the "little" man in my life


Hello everyone,

It is absolutely freezing here in Adelaide, South Australia at the moment !

Mind you with all this really cold yuck weather it has been a busy time for me on the scrap booking front. The cold weather means that is has been a perfect time to scrap away the time.

I am going to keep this post a little short as I have another post I want to sneak in sharing the napkin technique I told everyone about during the Helmar Father's Day Blog Hop.

As the layout that I created using my napkin technique isn't really a masculine layout I thought I would show you a layout I did of my son using the same technique I will show you how to do shortly.

And before you ask.. "No" the photo below wasn't posed or prompted.. my son was just mucking around while we were on holidays in the Flinders Ranges when I took this photo. I was just VERY luck that he was where he was at the time and had my camera ready to go!

So for this layout once again I managed to get down and dirty with lots of Helmar. The layout has lots of texture and dimension and was so much fun to create.

The best bit of the layout however.. is that I know ALL the elements will stay where I put them thanks to Helmar 450, Helmar Tape Runner, Helmar, Acid Free Glue, Helmar Liquid Scrapdots AND Helmar Krystal Kote Fixative.

Sure is one layout LOADED with Helmar !

TFL, Mx