Showing posts with label Helmar 450. Show all posts

Wednesday, April 24, 2013

Altering frame fun


Hello everyone.
 
Back to share with you a little something different this time around.
 
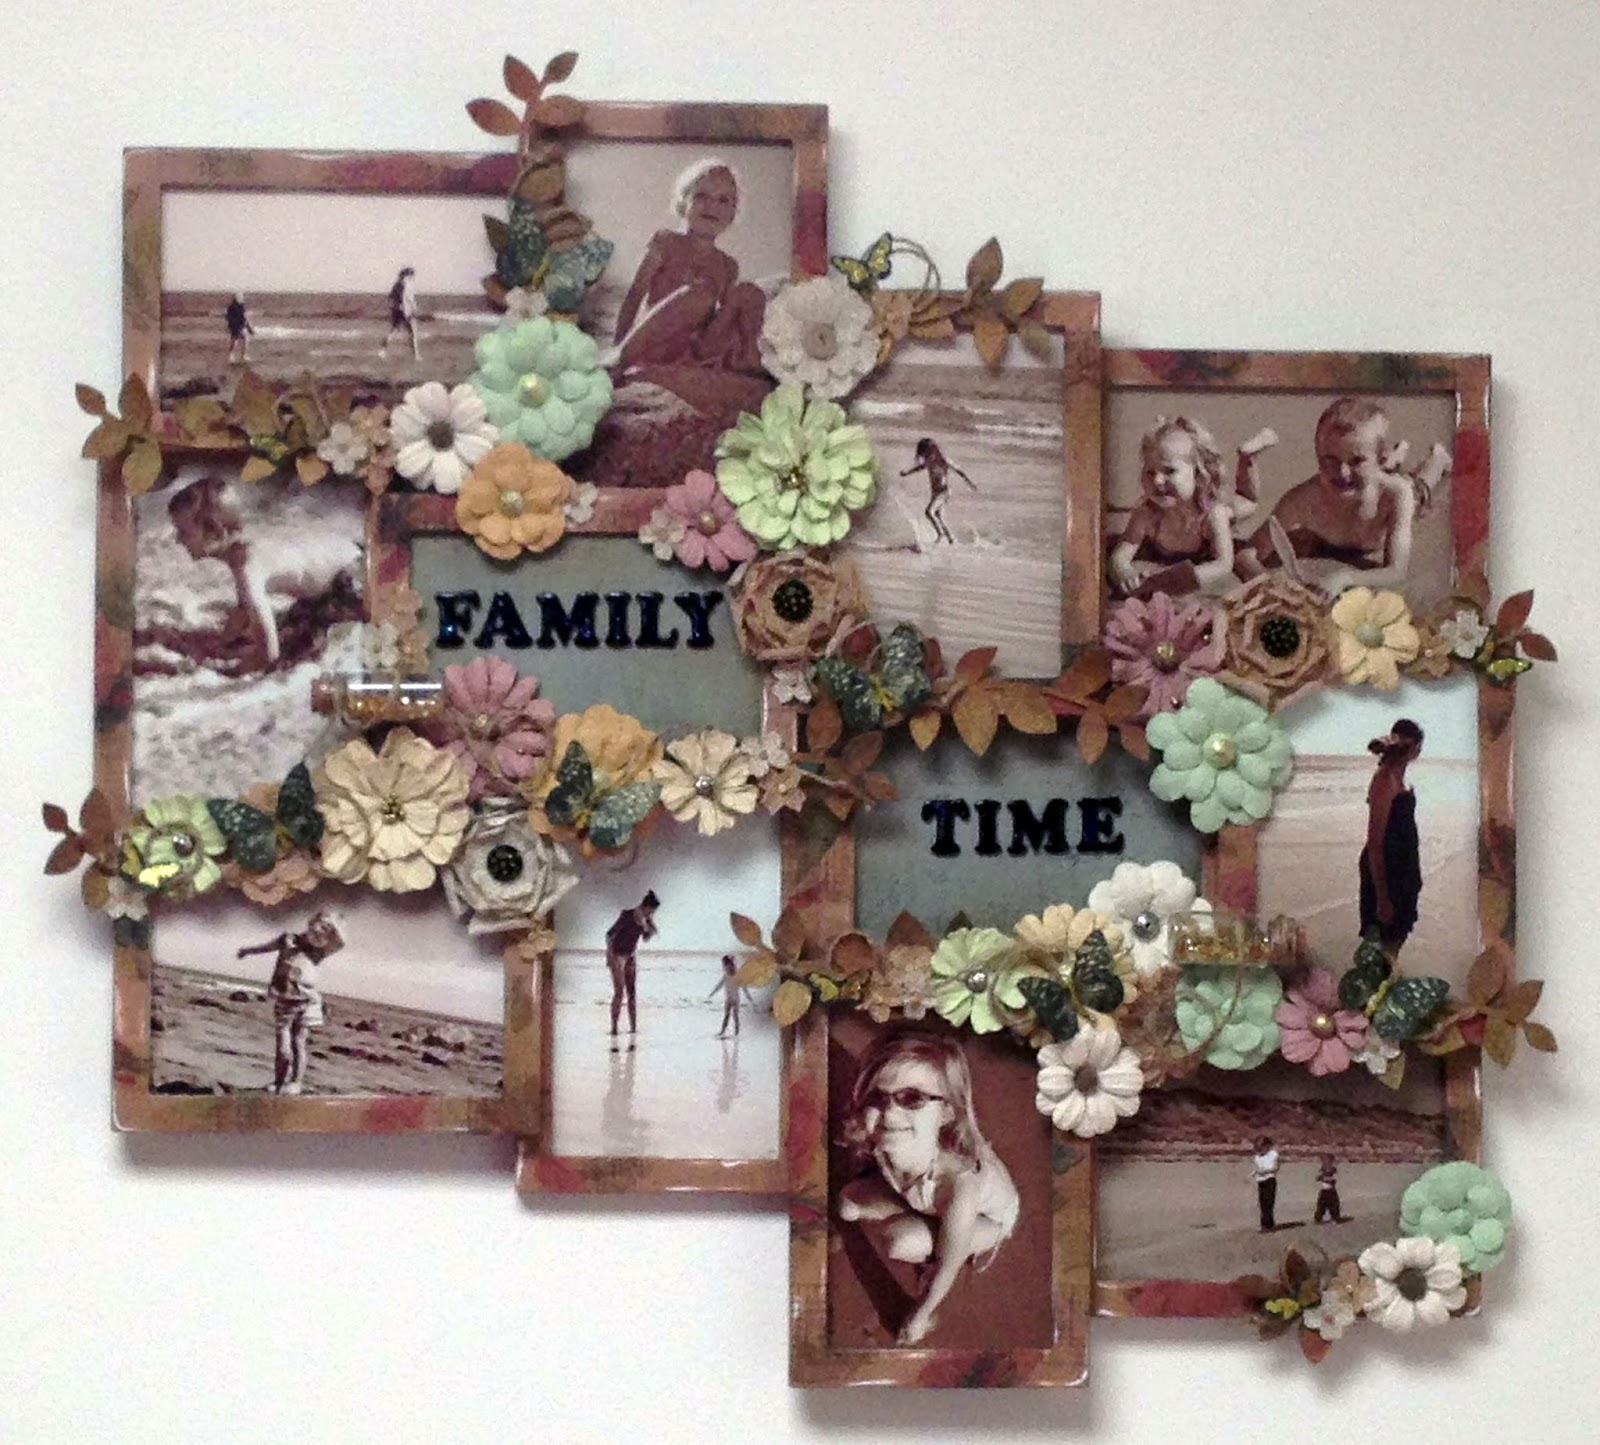
I have started to work on decorating my new house with some of my scrapbooking work and decided that I needed some photos of my children to adorn the walls.
 
Now I didn't want to hang up ordinary frames I wanted something just a little different.
 
So.. I found this frame at my local discount shop and set to work with a little help from some  of my favourite Helmar products.
 

Here is what I ended up with ..
 
 
What to know how I did this ??

Full instructions are on the Helmar Design Team Blog so head on over to get the scoop.
 
Why not think outside the box a little and jazz up a frame yourself.
 
TFL, M x

Monday, February 11, 2013

Challenging myself

Hello again.
 
I am back to share with you a layout using some goodies I was lucky enough to be able to play with on behalf of Helmar and 7 Dots Studio.
 
Now... to share a little secret with you all about me.. very rarely do I use a full sheet of patterned paper as a background for my layouts.. Yes.. I am a little frugal when it comes to patterned paper. I find it very difficult to use a whole sheet of patterned paper for a background.
 
However just for something a little different AND because I have realised after just having moved house recently just how much paper I ACTUALLY have, I thought I would challenge myself a little.
 
So with that in mind I set to work using the "Hopefully" paper range by 7 Dots Studio. The hardest part I had on starting was actually deciding which side of the paper to use !
 
Using my Helmar Adhesive Tape Runner to adhere the larger pieces together certainly made my job just that little bit easier. Plus the fact that it was held in place nicely for me to be able to add a hand stitched border without the worry that the page would fall apart as I was stitching.


The rest of the layout came together easy with the help of some Helmar 450 and Helmar Liquid Scrap Dots. Both products are a match made in heaven for the fiddly bit you want to add to your layout such as twine and small strips of paper.
 
Must say that it was super easy to create dimension on the flags with a little help from Helmar 450 and a paint brush... I folded the centre of the flag over the fatter part of a paint brush to curve it. added a dab of Helmar 450 to the ends only of the flag and secured them to the page where I wanted them. Once I could see that the flag had been secured I removed the paint brush. The end result is that the flag looks like it is flapping in the breeze.

 
The only issue I had when creating this layout was that I had run out of dimensional magic to put on my title. Well... I solved that problem quickly by adding a thin layer of Helmar Gemstone Adhesive to my title with a paint brush. It dries clear and has left the title with a nice glossy accent. Super easy and a great alternate use for such a great product.
 
Products Used:
 
Why not challenge yourself today to play around with products you wouldn't normally use.
 
Happy Scrapping,
 
M x

Tuesday, January 29, 2013

Bright and Summery Fun

Hello all.

While I was busily cleaning up my scrap booking supplies I had found some of this digital paper left over from a layout class I taught a while ago. Now I loved this paper and still do.
It has such a bright and bubbly feel to it.

So with that in mind and a cute photo I found of my daughter, Kiah, at the beach from Easter I hadn't played with yet and I got creative. With  little help from some punches, wooden flower templates, mixed stamps and some of my favourite Helmar products my job was made super easy.


Now because I really didn't have a huge amount of the paper left  after I had created the layout I decided to stock up my card stash with a few cards that could be used for any occasion.

So with a few wooden flowers used as templates I created these bright and summery feeling cards. By using a bit of Helmar Liquid Scrap Dots it was easy to create a bit of dimension to the cluster of flowers.


This one I used up left over bits to make strips that I adhered to a scrap of white card stock using some Helmar Acid Free Glue before stamping on it randomly to create the base. Super easy way to use up all your scraps.


Have you cleaned out your stash lately ?

Amazing all the bits and pieces you find when you do.


TFL, M x

Thursday, December 20, 2012

In ABSOLUTE heaven !

This week Helmar and Darkroom Door have teamed up.
 
Now.. what I can say about this is... OMG I have been hiding under a rock lately that's for sure !!!
 
Why oh why have I not discovered Darkroom Door products before !?!
 
I was in absolute heaven when my Helmar Design Team goodies arrived with some super yummy rubber stamps and word strips in it. Now I am in love with their products so much that I know that my stamp collection is just going to go through the roof soon!
 
Now as some of you may know I absolutely LOVE butterflies...
 
and guess what arrived in my pack...
Wings - Rubber Stamps (Cling Foam Included)
Yes.. these super yummy stamps!!!!
 
Was absolutely beside myself that I had to play with the straight away.
 
Now once I had created my base for my layout using some texture paste, paint and then glimmer mist I sealed the base of the layout using some Helmar Crystal Kote Fixative before I rubbed the base with  some ink to help the brick pattern shine through the base. once this was done I sealed the whole base with some Helmar Crystal Kote Matte Varnish. It too any unnecessary shine out and seal everything nicely.

Once the paper doily and paper had been adhered to the base I had created, using my Helmar Tape Runner and Helmar Acid Free Glue, I set to work embellishing the layout.

Now that is where my new Darkroom Door stamps came into play. Super easy to use and just perfect for what I had in mind for this layout. Using a few scraps of patterned paper I was able to stamp some butterflies and then cut them out by hand. The best bit about the butterflies though are that they are so life like looking. I think they almost look like they are flying on my page. To give the butterflies that little bit of dimensions and also to help adhere them to the different layers surface I had already created with the twine and chipboard swirl I used Helmar Liquid Scrap Dots. It meant the the butterflies could be adhered without any worries about an uneven surface.
 
To finish off the layout I really didn't want to do any huge amount of journalling. Now the perfect thing I found to use was the word strips by Darkroom Door. I was able to chose the words to suit what I wanted to say. I cut them out and inked each word. They were then scattered throughout the the twine and chipboard and adhered there using some Helmar Liquid Scrap Dots to give them some dimension. Super easy but every effective I think.


And here's the layout in full.
 
I had so much fun playing around with both my Helmar and Darkroom Door products.
 
Don't forget to check out the rest of the amazing creations the rest of the Helmar Design Team have created using these too products.
 
Products Used -
 
TFL, M x

Thursday, November 22, 2012

Cherish those around you

Hello all.
 
I am most excited to be able to share this Helmar project I created just recently with you all.
 
First to explain just a little about the project...
 
I absolutely adore creating things for other people. I also love being able to create something with a bit of meaning behind it. So bearing all that in mind I recently had a trip up to Townsville. Now before the trip I had it set in my mind that I wanted to be able to create a little something for the Woman's Hospital where my first child was born and became a little angel in heaven at the same time. The staff at the hospital were amazing and have been a great support to me and my family ever since. This year marked a special anniversary with it being his sixteenth birthday. So I wanted to be able to give back to all those special people that work in the Neonatal ward. I find the work, love and support that they put into their job truly amazing and have been blessed to have had them help myself and my family throughout the past years.
 
So.. with all this in mind I wanted to create something that could be hung up to remind everyone how precious time is and to not take anything for granted. Life is just too precious in my mind.
 
I created a canvas for the ward that was about 30" x 40" in size. I had lots of fun making so much mess with some Helmar Decoupage Paste, napkins and texture paste to create this canvas base.
 
 
I coloured my texture paste using an iridescent red paint. However because I also wanted to add some depth to the canvas with some script stamping, once the paint was dry I sprayed the whole canvas with a light layer of Helmar Cystral Kote Fixative. This prevented any running. Once I had finished all the stamping I then gave the whole canvas a coat of Helmar Crystal Kote Matte Vanish. This took any shine out of the base from all the adhesives and also seal the whole base nicely.
 
Using Helmar Liquid Scrapdots to adhere the embellishments to the canvas meant the I could create a lot of depth and dimension to the base with so much ease. And the best bit was that I knew with all the help from my trusted Helmar products that the canvas would stand the test of time without anything falling off.

 
I had stamped butterflies onto transparency paper that I had adhered napkins to. To adhere them to the base I used a dab of Helmar 450. It adhered them nicely to the texture paste with little effort.


Off to get crafting with some more Helmar goodness.
 
TFL, M x