Showing posts with label Helmar Gemstone Glue. Show all posts

Wednesday, April 24, 2013

Altering frame fun


Hello everyone.
 
Back to share with you a little something different this time around.
 
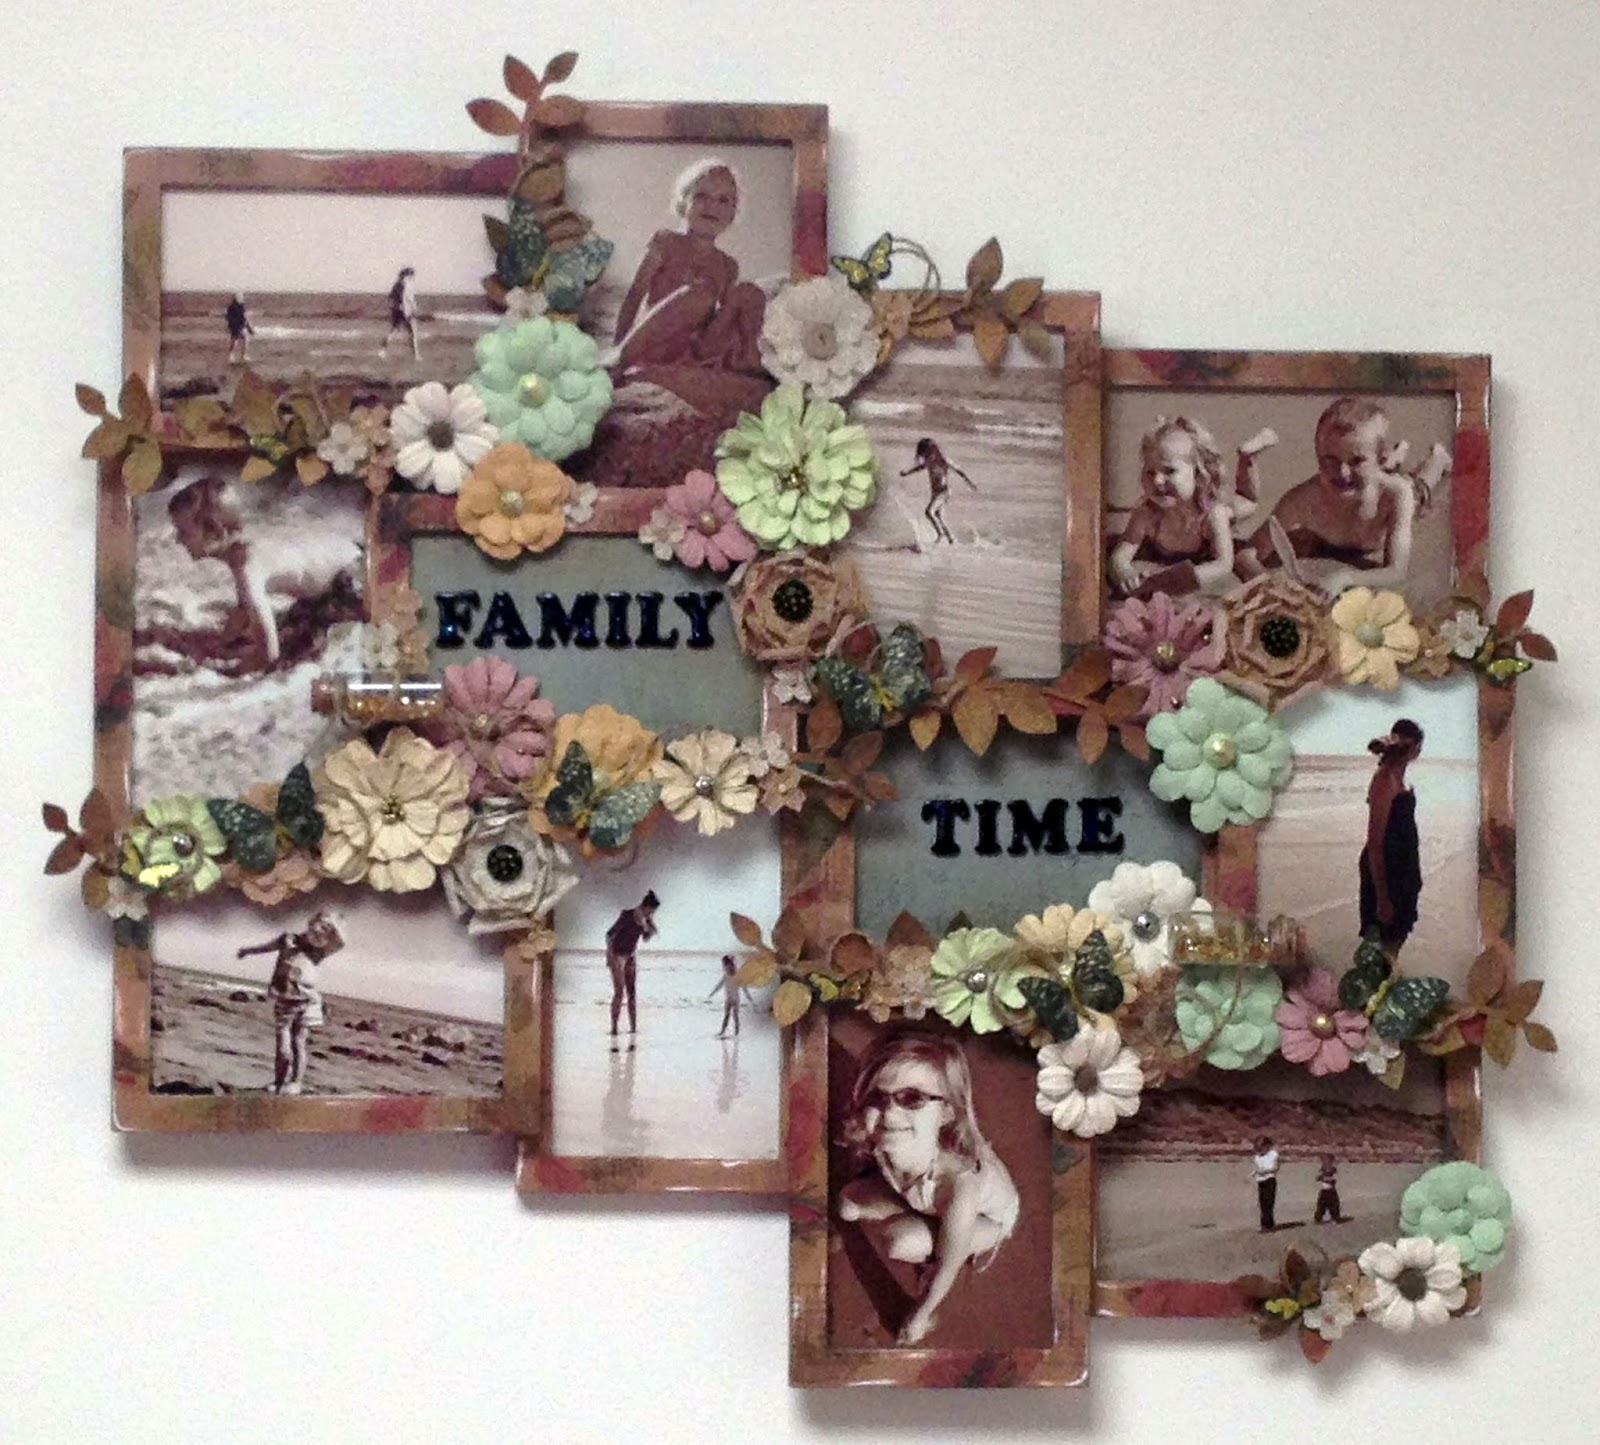
I have started to work on decorating my new house with some of my scrapbooking work and decided that I needed some photos of my children to adorn the walls.
 
Now I didn't want to hang up ordinary frames I wanted something just a little different.
 
So.. I found this frame at my local discount shop and set to work with a little help from some  of my favourite Helmar products.
 

Here is what I ended up with ..
 
 
What to know how I did this ??

Full instructions are on the Helmar Design Team Blog so head on over to get the scoop.
 
Why not think outside the box a little and jazz up a frame yourself.
 
TFL, M x

Thursday, March 7, 2013

Mixing it Up with a Tag

Hello there..
 
Michelle back to share with you what I have been playing around with this month.
 
Now Lydell is super with the monthly challenges and I must admit I have been too busy for ages to play around with them. I have been printing them all out and have had grand plans to play along for a few months.
 
So this month I decided enough was enough... I just HAD to play. Especially when I saw the super cute tag Lydell  had designed for Helmar. 

 
So.. I played around with the tag a bit and here is what I came up with.

 
Super easy with the tag sketch to give me some inspiration.
 
Now I am not much of a tag person... I don't tend to make them much as a stand alone item.
 
So.. Here's what I did with my tag.


I decided to use the tag as the main embellishment on a layout so to tie it all together I used the staples from the tag sketch to staple the bakers twine across the page. Then used same Helmar Liquid Scrap Dots to adhere some extra hearts along the twine and some Helmar Gemstone Glue to adhere some silver dew drops I had scattered through it all.
 
I decided to add my buckle separately next to the tag through a piece of ribbon. Now because this was rather bulky I used some Helmar Liquid Scrap Dots to adhere it in place.
 
So... I am now a convert. I loved making up this tag and look forward to using this tag sketch to create a few tags in the future.
 
Why not give this months Make a Tag Helmar Challenge a go.
 
TFL, M x

Monday, February 11, 2013

Challenging myself

Hello again.
 
I am back to share with you a layout using some goodies I was lucky enough to be able to play with on behalf of Helmar and 7 Dots Studio.
 
Now... to share a little secret with you all about me.. very rarely do I use a full sheet of patterned paper as a background for my layouts.. Yes.. I am a little frugal when it comes to patterned paper. I find it very difficult to use a whole sheet of patterned paper for a background.
 
However just for something a little different AND because I have realised after just having moved house recently just how much paper I ACTUALLY have, I thought I would challenge myself a little.
 
So with that in mind I set to work using the "Hopefully" paper range by 7 Dots Studio. The hardest part I had on starting was actually deciding which side of the paper to use !
 
Using my Helmar Adhesive Tape Runner to adhere the larger pieces together certainly made my job just that little bit easier. Plus the fact that it was held in place nicely for me to be able to add a hand stitched border without the worry that the page would fall apart as I was stitching.


The rest of the layout came together easy with the help of some Helmar 450 and Helmar Liquid Scrap Dots. Both products are a match made in heaven for the fiddly bit you want to add to your layout such as twine and small strips of paper.
 
Must say that it was super easy to create dimension on the flags with a little help from Helmar 450 and a paint brush... I folded the centre of the flag over the fatter part of a paint brush to curve it. added a dab of Helmar 450 to the ends only of the flag and secured them to the page where I wanted them. Once I could see that the flag had been secured I removed the paint brush. The end result is that the flag looks like it is flapping in the breeze.

 
The only issue I had when creating this layout was that I had run out of dimensional magic to put on my title. Well... I solved that problem quickly by adding a thin layer of Helmar Gemstone Adhesive to my title with a paint brush. It dries clear and has left the title with a nice glossy accent. Super easy and a great alternate use for such a great product.
 
Products Used:
 
Why not challenge yourself today to play around with products you wouldn't normally use.
 
Happy Scrapping,
 
M x

Tuesday, January 29, 2013

Bright and Summery Fun

Hello all.

While I was busily cleaning up my scrap booking supplies I had found some of this digital paper left over from a layout class I taught a while ago. Now I loved this paper and still do.
It has such a bright and bubbly feel to it.

So with that in mind and a cute photo I found of my daughter, Kiah, at the beach from Easter I hadn't played with yet and I got creative. With  little help from some punches, wooden flower templates, mixed stamps and some of my favourite Helmar products my job was made super easy.


Now because I really didn't have a huge amount of the paper left  after I had created the layout I decided to stock up my card stash with a few cards that could be used for any occasion.

So with a few wooden flowers used as templates I created these bright and summery feeling cards. By using a bit of Helmar Liquid Scrap Dots it was easy to create a bit of dimension to the cluster of flowers.


This one I used up left over bits to make strips that I adhered to a scrap of white card stock using some Helmar Acid Free Glue before stamping on it randomly to create the base. Super easy way to use up all your scraps.


Have you cleaned out your stash lately ?

Amazing all the bits and pieces you find when you do.


TFL, M x

Tuesday, November 6, 2012

All that sparkles

Hello all.
Wow.. what a start to the month it has been.
With The Robin's Nest and Helmar blog hop things certainly have been very craft inspired that is for sure.


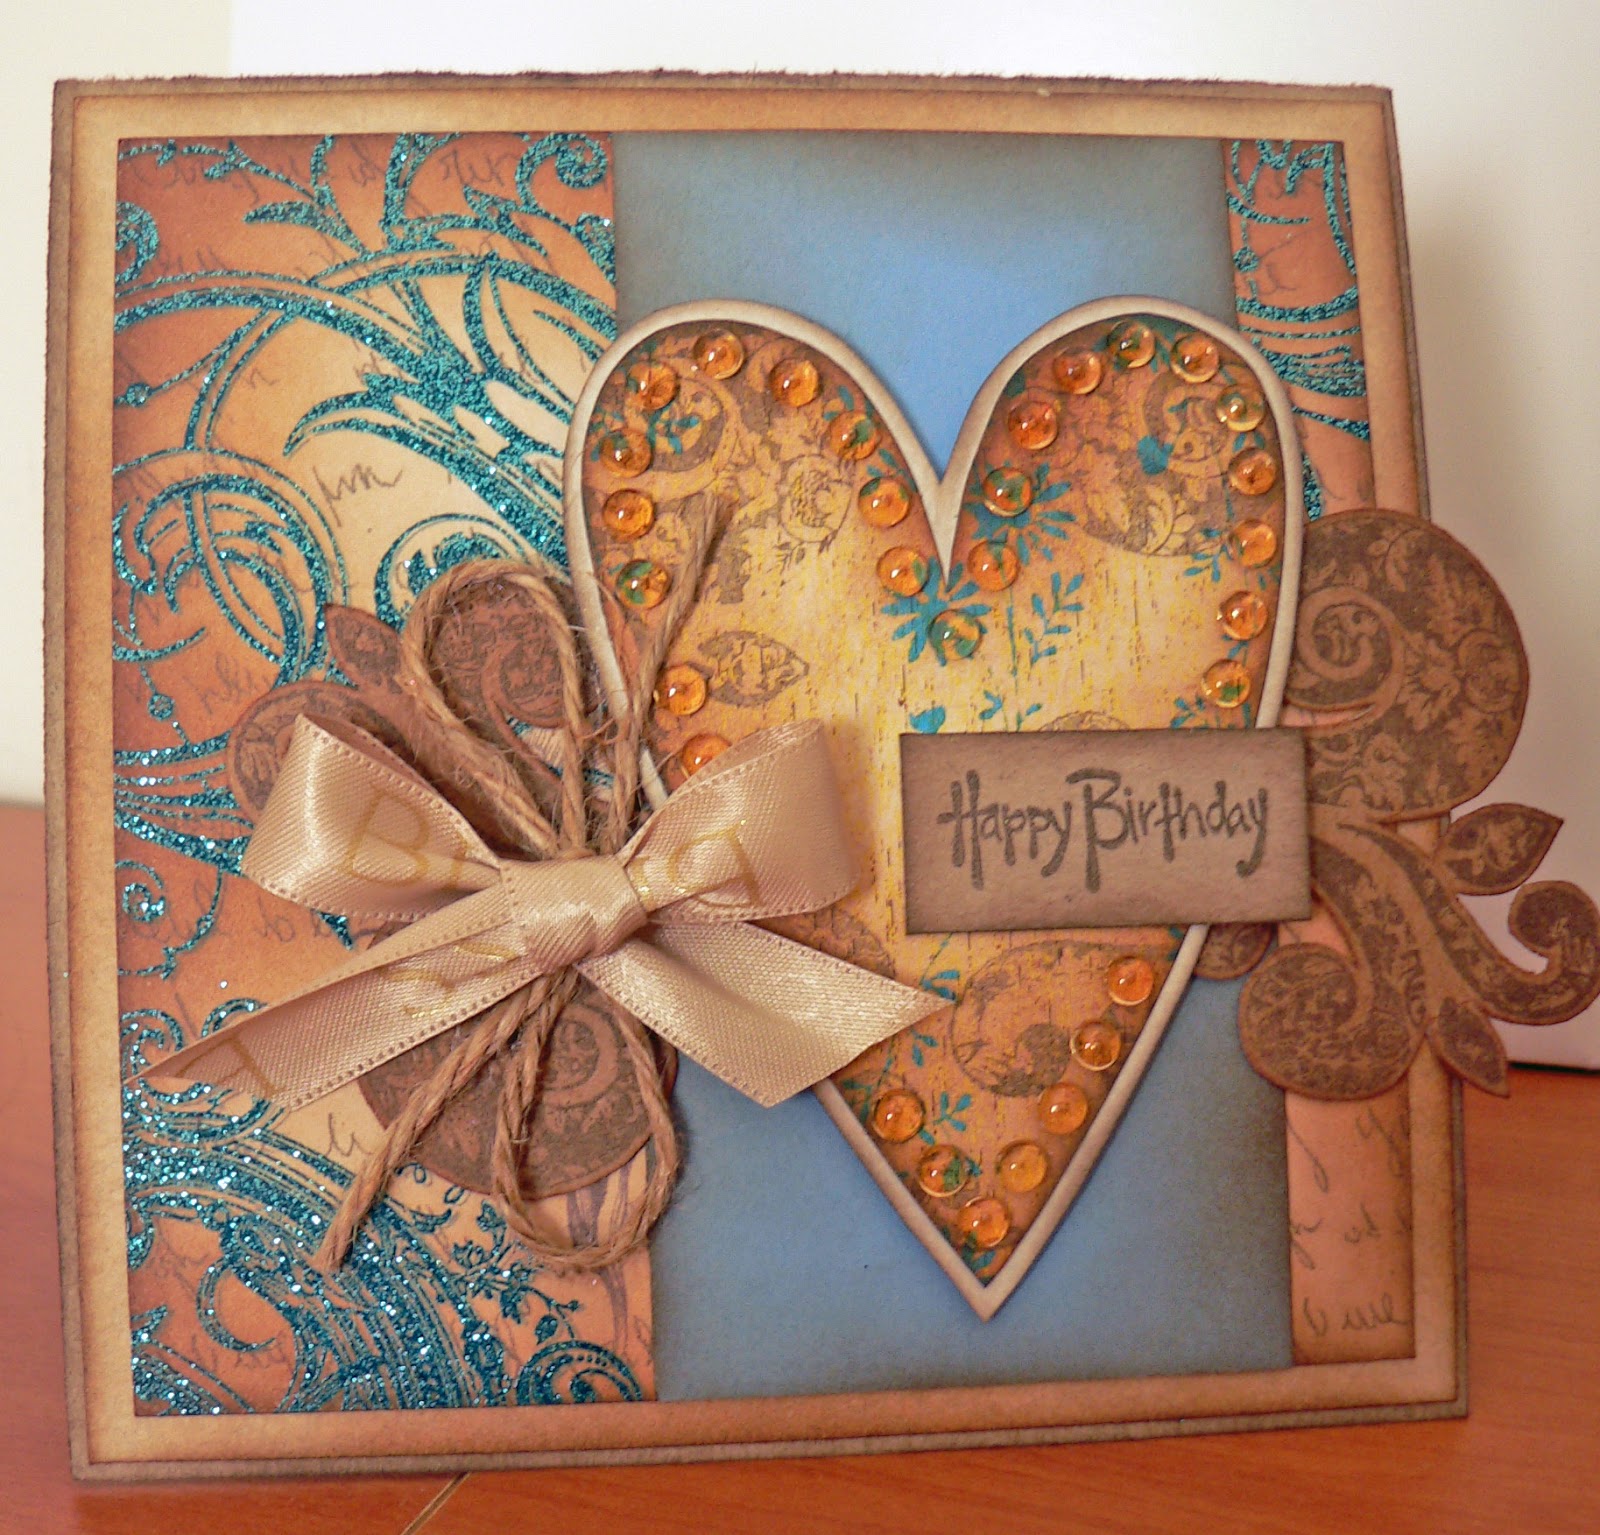
With that in mind I have been busy with birthday cards again. Seems that this month is just as busy with birthdays for friends and family.
This time around it was very close friends birthday that I have been busy creating for. So with a little help from some products from The Robin's Nest I was able to create a very elegant birthday card.

I also played around with some flourish stamps to created my stamped flourish on some recycled card. Then used the same flourish stamp to highlight parts of the heart. Just because your patterned paper is already patterned doesn't mean that you cant mix it up a little to tie it into your design.

  
The Robin's Nest products used :
I had a lot of fun playing around with this card and it was super easy and quick to create thanks to products from The Robin's Nest.

Why not check out what they have in store.
Happy Crafting, M x

Monday, October 15, 2012

Love Canvas

Hello everyone.

Michelle here from Adelaide, South Australia here to share with you what I have been busy creating.

Just recently I was lucky enough to be able to head up to Townsville in  the northern part of Australia to visit someone who is very special to me.

When I was planning my trip I decided that I wanted to be able to give a little gift as a memento of my visit. So with a little help from some of my favourite Helmar goodies I got creative.

While I was creating I had to bear in mind that I didn't that I didn't want what I was creating to be too girly. I also wanted to play around with many textures and decided to create a canvas.

I created my first dimensional layer on the base of the canvas using my napkin and Helmar Acid Free Glue wash technique (1 part Helmar Acid Free Glue to 3 parts water). Then it was a matter of white washing the napkin base when the napkin layer was adhered and dry.

I then used a plastic laser cut template and some texture paste to create another layer of dimension to the canvas. Once the texture paste was dry I was able to paint the texture paste with some iridescent gold H20 LuminArte. I then added a layer of Helmar Krystal Kote Fixative to seal it all till I put on the next stage.

Then with a little bit of help from some Helmar Krystal Kote Fixative I was able to then add multiple layers of both water based and permanent ink without the worry of them smudging and smearing at any stage.

Once I was happy with all the base layers I had created for my background I then gave the whole base a coat of Helmar Krystal Kote Matte. This helped to seal it all and also too any shine from the Helmar adhesives out to create a complete matte background.

Then the process began of adhering and layering my title and the embellishments.

Now being a canvas, which had multiple layers and mediums on the base, I wanted to make sure that the embellishments stuck hard and fast. So with a bit of help from some Helmar 450 this process was quite easy. I even found that I was able to adhere my metal flowers (mwah to Rae Cooper for these beauties) with ease.

Now to finish off this canvas and give it the final touches I adhered some dew drops to the centre of my metal flowers using some Helmar Gemstone Glue. It dried nice and clear so that the metal of the flowers was able to shine through the clear dew drops.


Now it was a bit of a labour of love waiting for a few layers to dry, but ultimately with a bit of help from my trusted Helmar adhesives I was able to share some loving around.

I know that my gift will stand the test of time without things falling off thanks to some great Helmar adhesives.

Why not have a play around with some Helmar products yourself and see what you can create for someone special in your life like I did.

TFL, M x

Saturday, July 21, 2012

Making a mess and getting creative with The Robin's Nest and Helmar

This week, the Helmar Design Team have been having a blast playing around with some fun products from

I must say.. that until recently I knew very little about The Robin's Nest and what products they have.
Well.... I have been majorly missing out that's all I can say.

Since I have received some of their products from Helmar and am now part of The Robin's Nest Design Team, I have had a chance to really play around with some amazing products.

As I said in my first post for The Robin's Nest I have ABSOLUTELY fallen in love with their dewdrops.

I think I have used them on every card and layout I have made in the last week. They are so versatile and add the extra pop to cards and layouts alike. I know that I am eager to pop over to the shop and stock up as they are so much fun to play with.

Plus to add to the added bonus I am now in love with their papers. I have been covered in glitter for the last week playing around with their paper ranges. I have never really been a huge glittered paper fan. That was until I received some of The Robin's Nest papers to play with. I have found the quality to be really good and the thickness of them perfect for playing around with and making a huge mess.

And yes... as most of you know I do like to mix it up a bit and play around with my papers.
So.. I got to work when I received my supplies to create this layout.

The base of the layout was created using old book pages adhered using my trusted Helmar Acid Free Glue wash to a piece of pasteboard cut to size and then lightly misted with gesso spray to mute it down. I then spread the centre of the layout with a layer of texture paste roughly and added a colour wash when the texture paste was dry.

The hearts were then created by book page adhered to light card stock using Helmar Acid Free Glue wash, and the others are hand cut from The Robin's Nest paper that I had chosen to work with because of the thickness of The Robin's Nest paper it was perfect for creating embellishments from. I was able to hand stitch them onto the card stock base quite nicely and fold the edges upwards and they help their shape.

I was then able to add that extra little bit of pop to the layout by adding The Robin' Nest dew drops to the smaller black hearts and randomly adhered them using Helmar Gemstone Glue over the base of the layout. I used the clear dew drops, which meant they were able to pick up the colours from the base of the layout nicely.

So super easy to create such a simple layout using some great products from Helmar and The Robin's Nest.

Off to play some more with my Robin's Nest products.

Happy Scrapping.

TFL M x